Fixing a dull knife
What is a burr on a knife?
A burr is the thin strip of steel pushed past the edge when one side is ground. When it runs the full length of that side, the new bevel has reached the edge—and it has to come off before the knife cuts cleanly.
By Rollkeen, which sells a rolling knife sharpener Published
A burr is the thin strip of steel pushed past the edge
When one side of a blade is ground, the abrasive works across the bevel until it reaches the edge itself. The last metal there, too thin to see, cannot be cut clean: the pressure from the abrasive pushes it over to the opposite face of the blade, where it hangs as a thin fold. That fold is the burr.
Zwilling describes it as waste metal that appears on the back of the blade after a few grinding strokes. It has to come off before the knife cuts cleanly—if it stays on, the fold rolls back against food instead of slicing through.
How to feel for a burr, and which side to check
Feel on the face opposite the side you ground. While the abrasive works the right face of the bevel, the burr builds up on the left face. Checking the face being ground tells you nothing: the burr is on the other side.
The safe method: rest the pad of one finger flat on the blade, on the face away from the abrasive, and draw it toward the edge and off it, not along the edge. The burr catches the fingertip as a faint roughness or drag—Rollkeen's how-it-works page calls it "a faint rough lip." It is easy to miss on a fast pass.
Opinel and Outdoor Life's tester both treat the burr running the full length as the signal that the coarse stage is done on that side.
A burr confirms the coarse stage worked—it does not mean the knife is done
Feeling a burr confirms that the new bevel has reached the edge on the side you ground. It is the standard evidence that the coarse stage is finished there. What it does not confirm is that the job is done.
Science of Sharp's microscope images show two limits that change how to use this check. First, a burr that stands nearly straight up at the edge tip cannot be felt at all, so the absence of a detectable burr is not proof that the side is unfinished. The burr may be there; your fingertip may not catch it. Second, after you turn the knife and start the second side, what you feel as a burr can be the first burr folded back over. A strong catch on the second side may be a new burr, or it may be the old one bent back. The two are indistinguishable by touch.
Use the burr as a signal that the coarse stage is done on the side you ground. Finish on the fine grit regardless, and use the tomato test as the final check: a sharp knife goes through the skin without pressing down. If the knife still fails the test after the fine stage, why a knife stays dull after sharpening covers chips, mismatched angles, and other causes.
How a burr comes off
The fine stage handles burr removal. The standard method is a few light alternating passes per side: one or two strokes on the first side, then one or two on the second, until the edge passes the tomato test.
| Tool | What to do |
|---|---|
| Fine whetstone | Light alternating strokes per side on the finest stone you have. Keep the pressure minimal. |
| Ceramic or fine disc | A few passes per side, alternating. Rolling sharpener instructions and sharpening guides both give this as the standard method on the fine stage. |
| Smooth honing steel | Light passes after the fine disc. A smooth steel can knock off a refined burr as a finishing step. |
| Leather strop | An optional step after the fine grit. Outdoor Life's tester found a few strop passes took the edge beyond what the fine disc had done. |
One caveat from Science of Sharp: light alternating strokes often thin and straighten a burr rather than cut it off cleanly. A very thin, refined burr does not necessarily harm the final edge, but trying a few strop passes is worth adding as a finishing step when the tomato test still fails after the fine disc.
Where the burr fits in the full sharpening sequence
The burr marks two transitions: when it runs the full length on the first side, switch to the second; when the fine stage removes it, the knife is done. In sequence:
- Coarse grit, first side. Grind until the burr runs heel to tip on the opposite face.
- Coarse grit, second side. Turn the knife and repeat. A burr should come up on the first side—though it may be the first burr folded back over rather than a new one.
- Fine grit, alternating. A few light passes per side to refine the edge and remove the burr left by the coarse stage.
- Test. Slice a ripe tomato: the knife is ready when it goes through the skin with the weight of the blade alone. Keep the fine stage going until it does.
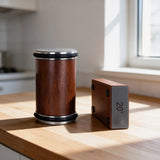
On Rollkeen's rolling sharpener, the 400 grit diamond end plays the coarse role and the 3000 grit ceramic end handles the fine stage. The step-by-step, covering which way to roll, how to feel for the burr at the tip, and what to do at the heel, is in how to use a rolling knife sharpener.
For a completely dull knife, the coarse stage takes considerably longer before the burr can form; more steel has to come off before the new bevel reaches the edge. How to sharpen a very dull knife explains why that first session takes the most time.
Sources

Rollkeen rolling knife sharpener
A magnetic block holds the knife at 15° or 20°. You roll the disc along the edge.
400 grit diamond on one end of the roller, 3000 grit ceramic on the other.
See the sharpener